Thinking about adding a touch of modern flair to your home? Well, look no further than concrete DIY projects. From sleek countertops to minimalist planters, the versatility of concrete offers endless possibilities for creative enthusiasts like myself. In this article, I’ll guide you through the exciting world of DIY projects using this trendy and durable material. Whether you’re a seasoned DIY-er or just dipping your toes into the world of crafting, working with concrete can be a rewarding experience.
Concrete for DIY Projects
 I love working with concrete because it’s incredibly versatile. From sleek countertops to sturdy planters, the possibilities are endless. Being readily available at local home improvement stores, concrete is accessible to anyone looking to embark on a DIY project.
When it comes to DIY projects, cost is always a factor to consider. Concrete offers a cost-effective solution for creatives on a budget. Its affordability compared to other building materials makes it an appealing choice for those looking to save money without compromising on quality.
Essential Tools and Materials for Concrete DIY Projects
Basic Tools List
In my experience, here are the essential tools you’ll need for concrete DIY projects:
- Mixing Container: A sturdy bucket or wheelbarrow for mixing concrete.
- Trowel: For spreading and smoothing the concrete mix.
- Rubber Gloves: To protect your hands from the caustic nature of concrete.
- Concrete Float: Helps in finishing and leveling the concrete surface.
- Measuring Equipment: To ensure precise measurements of concrete and water.
Materials Needed
When embarking on concrete DIY projects, the following materials are a must-have:
- Concrete Mix: Choose the appropriate type based on your project requirements.
- Water: Essential for mixing with the concrete to achieve the right consistency.
- Mold or Form: Use to shape the concrete into your desired project.
- Concrete Sealer: Helps in protecting the finished project from wear and tear.
With these essential tools and materials at hand, you’re all set to kick start your concrete DIY projects with confidence and precision.
Step-by-Step Guide to Simple Concrete DIY Projects
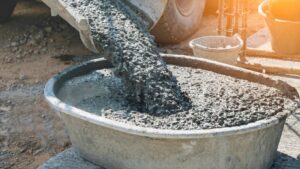 To create sturdy DIY projects with concrete, I recommend starting by mixing the concrete properly. Measure the concrete mix and water accurately to achieve the ideal consistency. Mix the components in a mixing container using a trowel until you get a smooth texture. Consistency is key to ensure the strength and durability of your concrete creations.
Once the concrete is mixed to perfection, it’s time to mold your DIY project. Use molds or forms to shape the concrete as desired. Ensure the mold is well-supported and free of air bubbles by tapping it gently. After molding, cover the project with plastic and let it cure for at least 24 hours. Proper curing is crucial for the concrete to achieve its full strength and durability. Be patient during this process to enjoy long-lasting results.
Tips for Achieving Professional Results
To enhance the appearance and durability of your concrete creations, consider utilizing various surface finishing techniques. Some popular options include:
- Polishing: Achieve a smooth and glossy finish by polishing the cured concrete surface.
- Texturing: Add depth and visual interest by incorporating textures with stamps or brushes during the curing process.
- Etching: Create intricate patterns or designs by etching the surface of the concrete before it fully cures.
- Sealing: Protect your concrete projects from stains and enhance their longevity by applying a sealant.
Coloring and Decorating Concrete
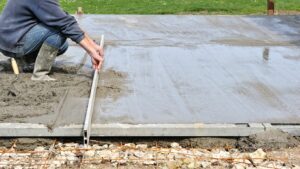
Adding color and decorative elements to your concrete projects can transform them into personalized and eye-catching pieces. Here are some methods to consider:
- Integral Coloring: Mix pigments or dyes directly into the concrete mix to achieve uniform color throughout the project.
- Staining: Apply acid or water-based stains to the cured concrete surface to create variegated and unique color patterns.
- Embedding: Incorporate objects like glass, stones, or tiles into the concrete to add visual interest and texture.
- Painting: Use concrete paint or stain to add intricate designs, patterns, or illustrations to your projects.
By exploring these surface finishing techniques and experimenting with coloring and decorative options, you can take your concrete DIY projects to the next level and achieve professional-looking results.

